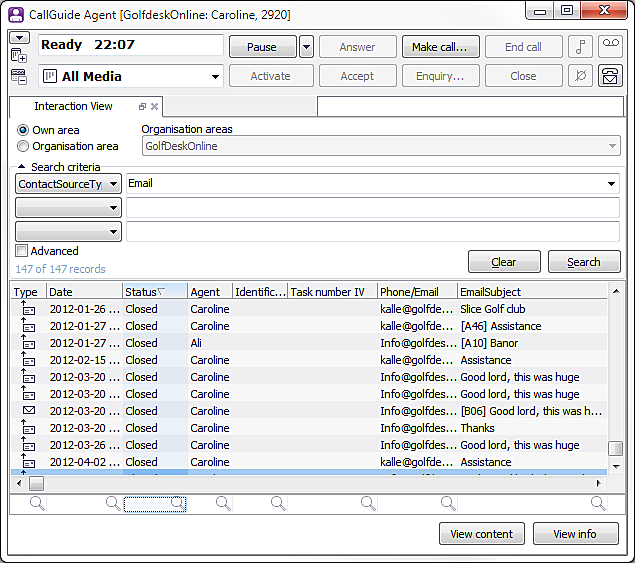
At the bottom of tables in ACE Agent and ACE Admin you find a row, originally not visible, with cells where you can enter various criteria for search in or filtering of the table contents. To activate the search tool, you can choose between
When the search tool is active you see a magnifying glass ![]() at the bottom of each column.
at the bottom of each column.

In the context menu you also have the option of filtering the contents of the table, e.g. by a set value in one of the columns.
A filter funnel ![]() at the bottom of a column indicates that you have opted to filter by the contents of that column.
at the bottom of a column indicates that you have opted to filter by the contents of that column.
When the search and/or filtering is completed you close the search tool by
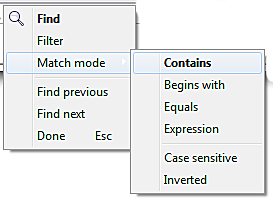
To search for a row with a specific text, you enter the text searched for in the column in question. In the context menu you can choose how what you enter is to match the contents of the column. You can use four different methods for matching as well as with or without case sensitivity.

The matching method selected for each column is seen in the context menu, in bold, but also with a specific sign by the pictures of magnifying glass and/or filter funnel. If the Case sensitive menu choice is selected, ACE distinguishes between upper and lower case letters at search and/or filtering. This is illustrated in the picture by a letter (a), e.g.  or
or .
.
The methods, explanation of their meanings together with a few examples of how they are visualised in a column, can be seen in the following list:


 in the search/filter symbol. The search hits begin with a given letter letter/text/figure.


Alternatives are described by a vertical line, |. It is used for matching at least one of two alternatives. CK | Q matches both callback and queue.
If you have not made a specific matching choice in the context menu, matching will be made from what the text or the figures begin with. When a row matches your entry, your focus will be moved to the matching row.
If there is no matching row you hear the Default beep
system sound and your focus stays in the same row.