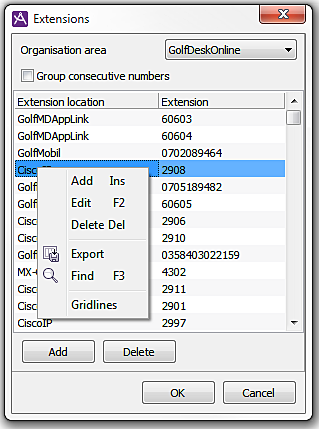
All extensions belonging to an extension location and that are to be used by agents in ACE must be entered in ACE Admin. This is done under the Media | Telephony | Extensions menu choice.
In the Extensions window, information is processed about which organisation area, and which extension location each extension belongs to.

Which extensions you see in the list is ruled by what you have selected in the organisation area drop down menu.
If the Group consecutive numbers check box is ticked, the extension numbers are clustered instead of being displayed one by one. For example 2900-2904 instead of 2900, 2901, 2902 etc. for clarity.
Extensions shall be specified in concordance with the description of the extension location configured in the Locations, Extensions, and access codes window.
The extensions must be specified in the form that the underlying telephony connection requires:
All extensions included in your telephony solution do not have to be configured here. If you are using so-called User Extensions, the operator can, via ACE Unifinder, queue to telephone numbers found in connected UC systems and address books. The only requirement is that the numbers there are in an international format (such as + 46 18 123456), or national format (such as 018123456).
You also have the option of adding to the extension series for a location via the open System Functions Interface. This applies to extensions that exist but are not used by agents in ACE. The reason for wanting to make the complete extension series visible to ACE is that you thenare provided with the option of calling all extensions via extension numbers from ACE Agent. The advantage of completing the extension series via the open interface is, for one thing, that you then do not have to configure all extensions in ACE Admin (which is good if the number of extensions in the company is large).
If you are using Microsoft Lync as PBX, you should also read Specific configuration of the Microsoft Lync PBX type.
To add one or more extensions proceed like this:
OK saves all modifications made and closes the Extensions window. Cancel ignores all modifications made and closes the Extensions window.
The Export menu choice can be used for transferring all data to a file that can be opened with Excel.
To delete an extension, select the row in question in the list and click on Delete, press the Delete on your keyboard, or right-click to select Delete in the context menu.